When we go out for breakfast or brunch I love to order poached eggs. I like the simple clean look of a poached egg and the way the yolk creates a sauce for the protein and starch beneath. Even though there is not much to it I always feel like I am having real treat. So, it occurred to me that I should learn how to poach eggs and have the option to make them at home.
I read a few articles and then grabbed a sauce pan and a couple of eggs. My first few attempts did not resemble the beautiful little pillows I was used to eating. They hit the hot water and immediately exploded into a feathery mess that looked more like egg drop soup than brunch. But I knew it was possible to poach eggs so I went back to the internet to learn more. After some more reading and further experimenting I can now sit down to an egg-topped entree anytime I'm in the mood.
Well... not anytime. You see one of the things I learned about poaching is you need the freshest eggs you can get. Fresh eggs have firmer whites, eliminating the feathery explosion I first encountered. Sometimes my eggs spend a little bit of time hanging out before I have a use for them. I generally don't try to poach eggs after more than a few days in the fridge.
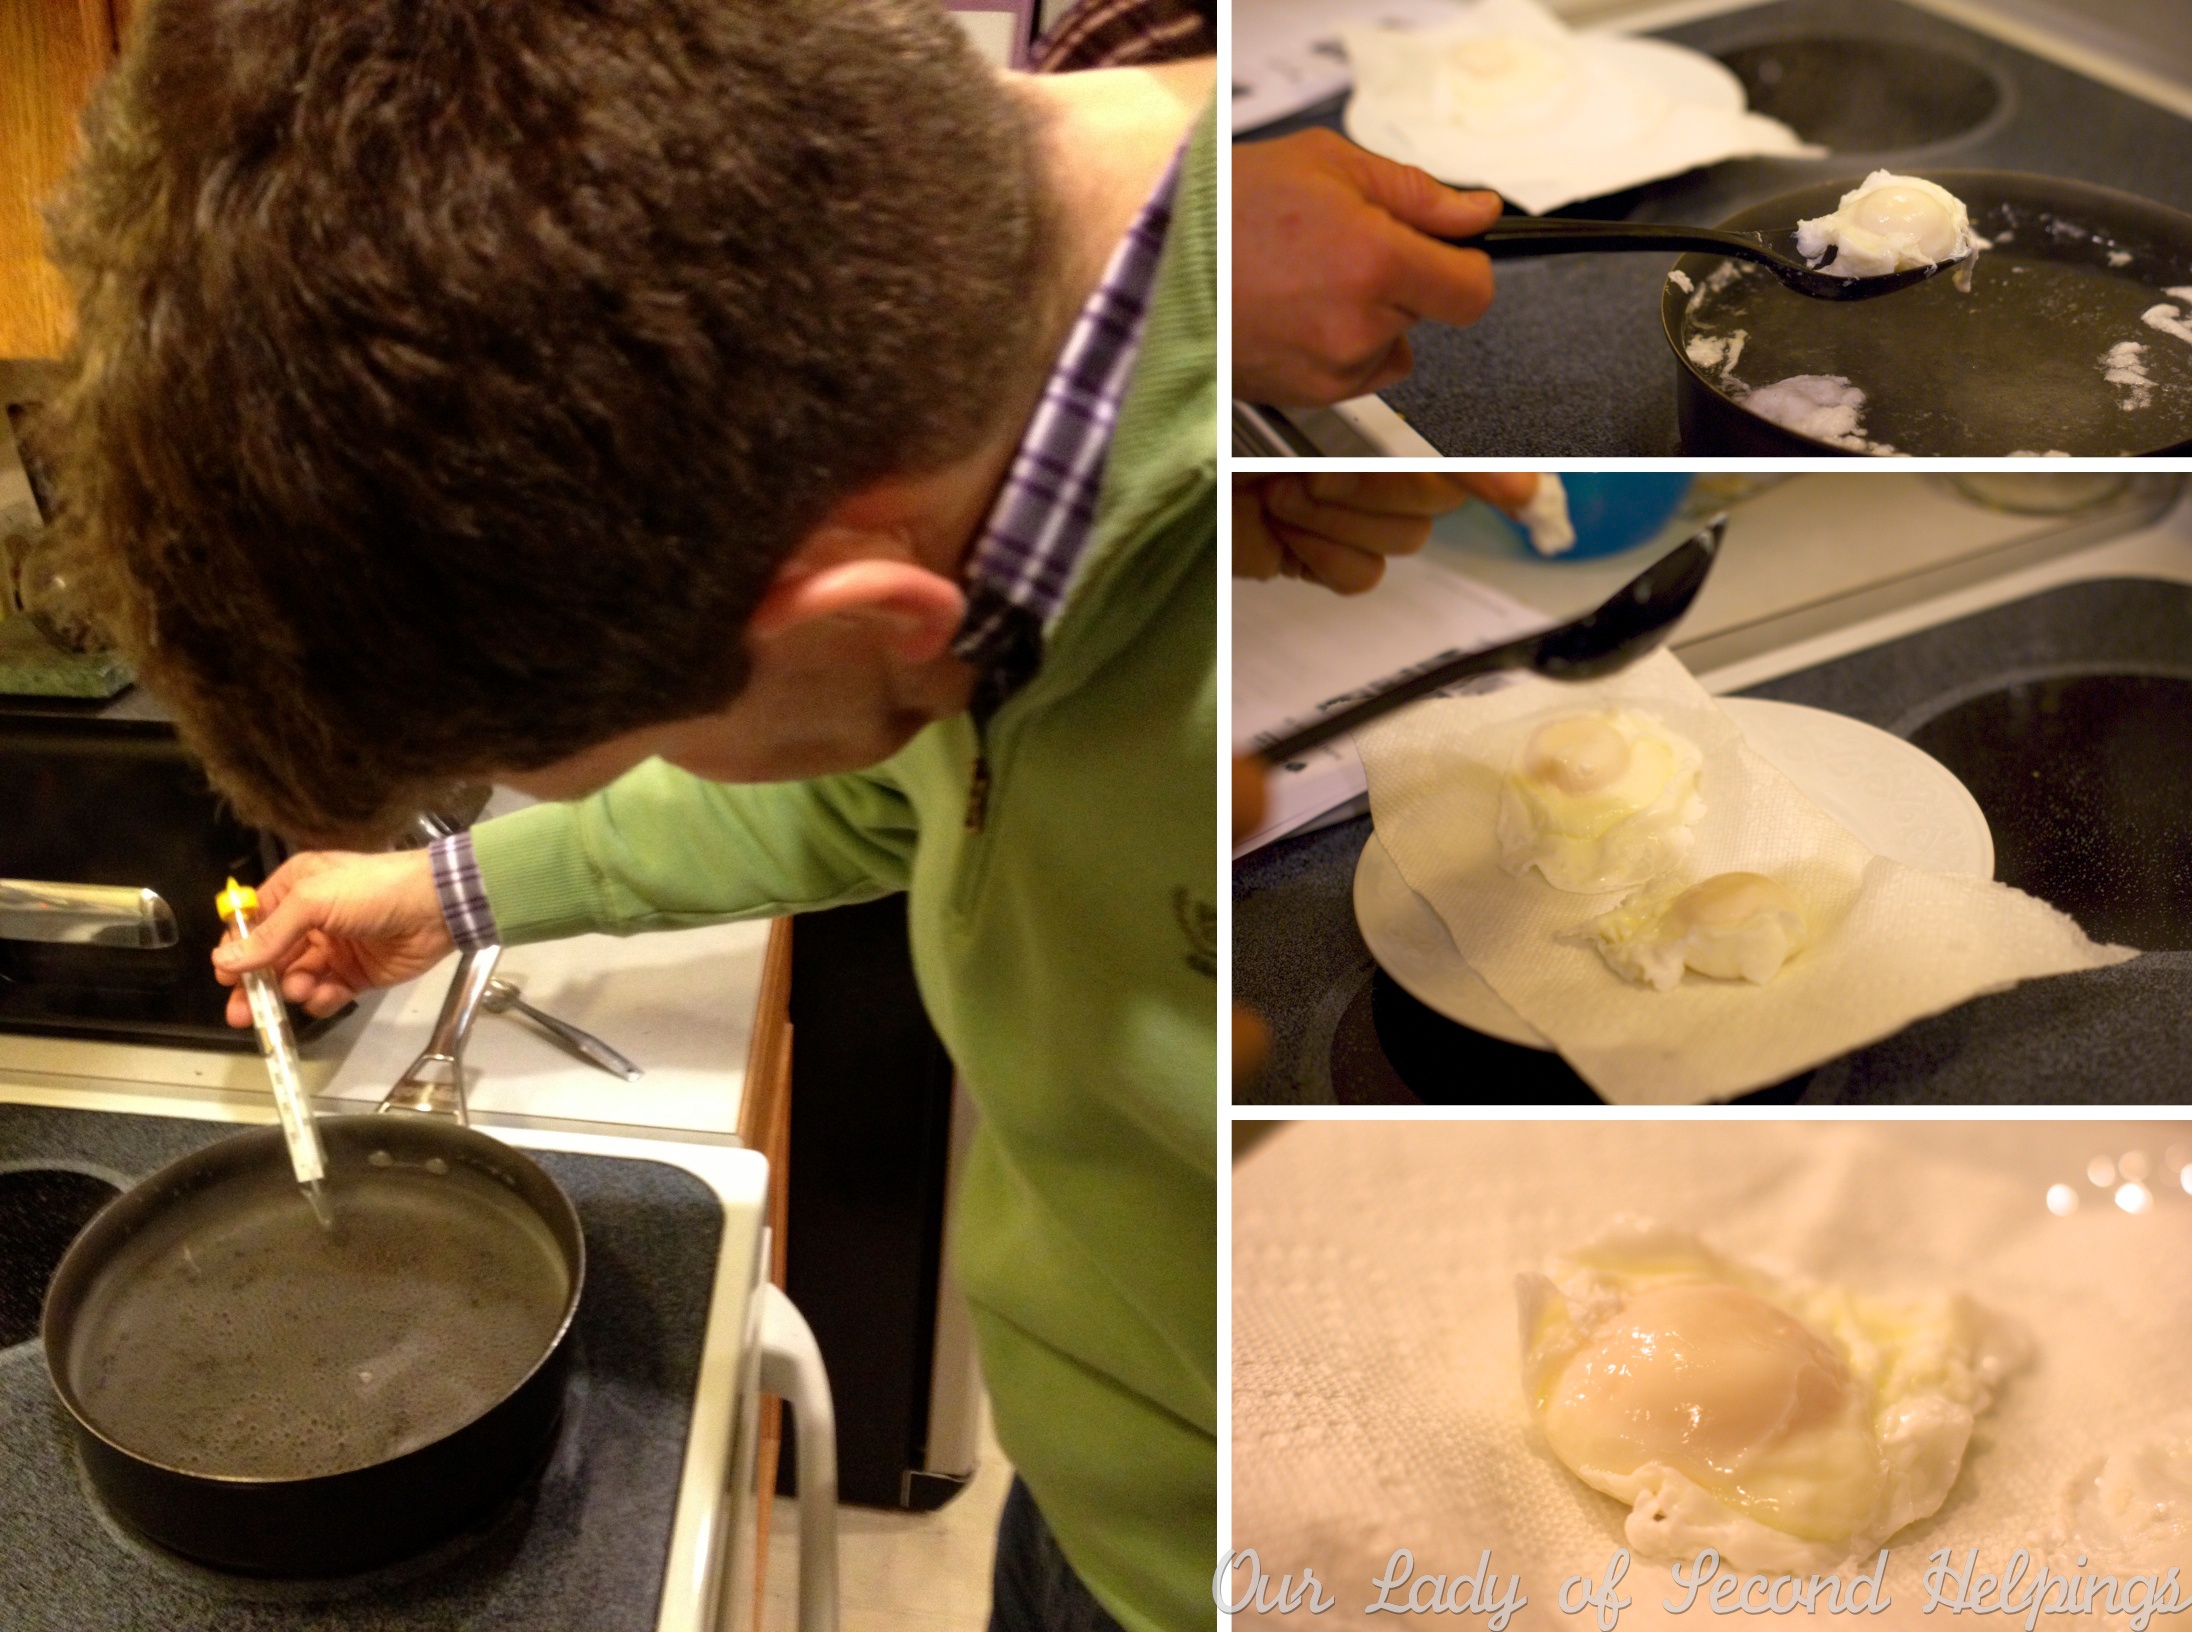
While I was getting the hang of how the process should look and feel I used a candy thermometer to check the water temperature. After some time I learned to look for a layer of tiny bubbles over the bottom of my pan to indicate the time to add the eggs.
To make your own poached eggs follow the tips below in order. Do not be alarmed by the length of the list. I have broken the process down into baby steps to help eliminate some of the issues I first encountered. With a little practice, you too can have luxurious velvet-filled pillowy eggs any time you like (almost).
This is his first attempt AND if Mr. Second Helpings can learn how to do it...!
Tips for poaching eggs:
- Use the freshest eggs possible.
- Cook in a wide flat-bottomed saute pan filled with 2 to 3 inches of water.
- Add a splash of vinegar to the water — about a teaspoon.
- Do not let the water boil. The bottom of the pan should be covered with tiny bubbles but not actively bubbling. If going by temperature, 180 degrees F is a good target. Once the water is hot enough it may be helpful to reduce the heat below the pan a little.
- Break your egg into a small bowl or measuring cup; ⅓ or ½ cup is a good size. Use one cup per egg or quickly prepare one egg at a time.
- Lower the bowl with the egg slowly into the hot water. Partially submerge the container and let the egg slide into the water. It will feather a little but should stay mostly in one lump.
- Add your desired number of eggs one at a time. Do not try to cook more than four or five at a time.
- Check the water temperature. If it has dropped below 160 degrees F increase the burner temperature (or flame) to return the water to the correct temperature.
- Let the eggs hang out for about two minutes they will look like upside down jellyfish. While they cook, prepare a plate with a double layer of paper towels over it.
- Use a slotted spoon to gently lift the first egg you added to the water. Use your finger to give it a gentle poke and test for doneness. If it feels like a thin water balloon and gives no resistance give it another 30 seconds to 1 minute. You can decide how firm you want your eggs. I look for the texture of a sturdy pudding filled balloon. I am looking for eggs that are hot all the way through with a little creaminess around the outside with a mostly liquid yolk.*
- When the eggs have reached the desired level of doneness, remove them with the slotted spoon one at a time. Place the cooked eggs on the paper towel covered plate. Blot the tops if needed. This will absorb any water so you don't have watery food.
- The eggs are now ready to serve atop pretty much anything you can think of!
To make the meal pictured above:
- Split and toast a 100 calorie "thin" bagel - Everything flavor.
- Spread each bagel half with 1 - 2 teaspoons of low fat cream cheese.
- Sprinkle with dill - dry is fine, fresh is fab.
- Arrange 1 ounce of smoked salmon on each half, 2 ounces total. (Pictured are smoked salmon trimmings, not as pretty as thin sliced but cheaper.)
- Top with a freshly poached egg and a bit of black peper. Serve with a salad. (see: How to cut citrus segments)
Please note If you make your eggs runny, the way I do, they are technically raw. Therefore I feel obliged to include the following warning: The consumption of raw or undercooked eggs, meat, poultry, seafood or shellfish may increase your risk of food borne illness.


Adem
I now use clingfilm to cook my poached eggs as i find it so much easier and cleaner! In fact I have just written a blog about it to spread the word!